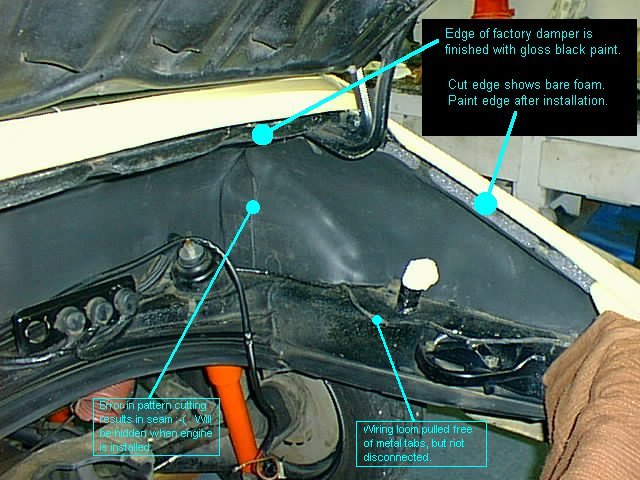
Wiring can be rerouted to insure it is undamaged during the removal of the original pad, without disconnecting it.
The ground connection stud is not readily seen until the voltage regulator panel is removed.
Viewed from the garage floor, looking up. Note that at this point the new damper has not been worked into position on the forward firewall.
The new damper has now been worked into place on the front firewall. The trick here is to keep wet adhesive off of the wires, shock towers etc.
As soon as the adhesive has set up enough to hold the damper in place on the top of the engine compartment, a temporary platform is build to support the inflatable object which will apply pressure to hold the damper in place while the adhesive cures.
An inflatable dinosaur was already in the garage to have a leak repaired. How convenient! Anything which is inflatable, light-weight plastic will work for this step.
During the inflation process, the dinosaur (or whatever) needs to be adjusted to insure that it is applying gentle pressure to the entire interior surface of the engine compartment.